Warning Bezel inserts are not all the same size! When buying a replacement insert, please check its outside diameter is correct for your watch model. The table below shows bezel insert sizes for a few models that are often used for Seiko mods. If the outside diamater of the insert is too big, it will not fit!
Seiko SKX mod: How to change your bezel insert
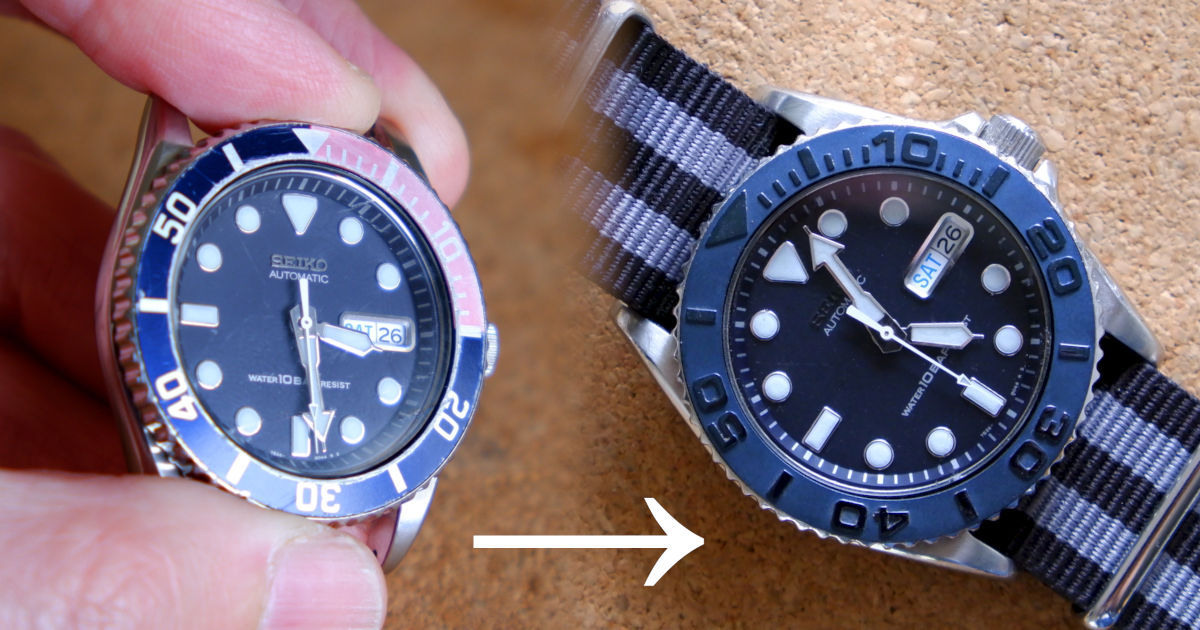
Want to change the look of your Seiko diver? Models such as the SKX and SRP range are easy to 'mod' and changing the bezel insert is a great place to start.
| Model | Outside diameter | Inside diameter |
|---|---|---|
| 7S26-0020 (SKX007, SKX009, SKX011) | 38.0mm | ~31.5mm |
| 7S26-0030 (SKX013, SKX015, SKX017) | 33.7mm | ~27.5mm |
| 7S26-0040 (SKX031, SKX033) | 37.6mm | ~30.5mm |
| 7S26-0050 (SKX02x) | 35.6mm | ~28.5mm |
| 4R36-04Y0 (SRP77x) | 39.1mm | ~32.5mm |
Step 1
In addition to a base watch (like this Seiko 7S26-0040 / SKX033), you'll also need the following items:
- A replacement bezel insert
- Double-sided bezel adhesive tape (this may already be supplied with the bezel insert)
- Caseback opener or strong penknife (a cheap one is likely to break)
- Cotton bud / Q-tip
- Toothpick
- Alcohol for cleaning

Step 2
With the caseback opener, carefully prise off the bezel. There should be a small notch on the side of the bezel, perhaps around the 30-35 area. Try to push in the caseback opener at this place and then several other places around the bezel, without twisting. Eventually the bezel should snap up and you can lift it off. Be patient and take a break if necessary — you don't want to damage the bezel or your hand.


Step 3
With your thumb, gently press the bezel insert from underneath, slowly moving around the bezel until the insert lifts off. Depending on the material, it can be easy to bend or deform the insert so don't use a knife here.


Step 4
There's probably a lot of old adhesive stuck to the bezel so remove most of it with a toothpick, then wipe the bezel clean with a cotton bud (Q-tip) dipped in cleaning alcohol.


Step 5
Now you're ready for the new adhesive. In my experience, handling the tape directly just leads to a sticky mess so here's what works for me: Cut around the circular adhesive tape so it's the same diameter as the bezel insert.

Step 6
Carefully peel off the backing paper around the egde only (it should be pre-cut), then place the whole adhesive circle on top of the bezel. It should fit snugly into the recess.


Step 7
With the toothpick, rub down on the backing paper around the bezel so the adhesive sticks well, then slowly push up the backing paper from under the bezel. You should be able to pull it away leaving just the adhesive in the bezel recess. If some of the adhesive is on the inside lip of the bezel, just push it down with the toothpick. We're finally ready!


Step 8
Refit the bezel to the watch, being careful not to touch the bare adhesive. If necessary, sandwich the watch between a couple of old books or magazines so you can press down more comfortably. With enough pressure you should hear it snap into place. I find it best to put the bezel on the watch first like this, so it's easier to align the insert in the next step.

Step 9
Rotate the bezel a little so it's settles between clicks. Then slowly place the top edge of the insert onto the bezel, making slight adjustments so the top arrow on the insert is perfectly aligned with the 12 o'clock marker on the dial or chapter ring.

Step 10
Finally press around the rest of the insert with your thumbs and admire what you've accomplished! For this watch, I want to replace the hands and scratched crystal as well, but we'll leave that for another day…
If you liked this, check out more articles about repairing, restoring and enjoying Seiko watches.